Product Documentation
Relay: Destinations
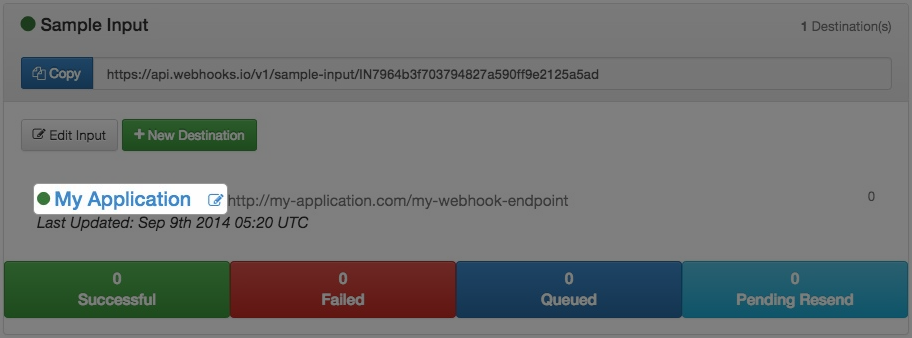
Destinations are the ultimate location you wish the webhook payloads to be delivered to and are related to Inputs. Each Input can have multiple destinations to which easily allows the ability to fan-out your webhook requests to multiple systems.
Creating a Destination
To create a Destination hover over the Webhook Buckets option from the top navigation and select the bucket you wish to have the input associated with. Click the name of the Input you wish to add a destination for.

After clicking the title the details of the input will be expanded. Click on the New Destination button. Complete the form and click Save. See the Destination Properties section below for more details on the form options.
Updating a Destination
To update a Destination hover over the Webhook Buckets option from the top navigation and select the bucket the Destination is associated with. Click the name of the Input the Destination is associated with.
After clicking the title the details of the Input will be expanded. Click on the name of the Destination to load the edit form.
Complete the form and click Save. See the Destination Properties section below for more details on the form options.
Deleting a Destination
To delete a Destination hover over the Webhook Buckets option from the top navigation and select the bucket the Destination is associated with. Click the name of the Input the Destination is associated with.
After clicking the title the details of the Input will be expanded. Click on the name of the Destination to load the edit form.
At the bottom of the form there is a red Delete Input button.
Destination Properties
| Field | Details |
|---|---|
| Destination Name | This is the name you would like to provide for the destination to help you remember the target the data is flowing to. |
| Endpoint URL | The actual URL the data should be sent to. Typically this will be a URL within one of your applications, however it can also be the URL of a third party integration. |
| Verify SSL | By default when POSTing to the Endpoint URL if SSL is being the system will ensure the SSL certificate is valid. If you are using a self signed certificate or are having issues POSTing to your endpoint, you can disable SSL verification checks. |
| Retry Policy | You are able to finely tune how failures should be handled and retried. Please see the Retry Policy page for details on these options. |
| Authentication Type | If you would like to add specific authentication parameters to the request you can do so here. The input that accepted the payload may have already verified the authenticity of the request (depending on your settings), so this field allows you to add the authentication that you wish the request to have when it is sent from our system. Please see the Authentication Types page for details on these options. |
| Alert On Failure | If a webhook request hits the "Failed" status, which means any and all retry polices have been exhausted this list of emails can be notified. |
| Webhooks.io Headers | When the request leaves our system we can add specific headers to the request in order for you to identify the request. By default we do not add any additional parameters, however you can choose the parameters you wish to have added here. |
Inputs Gateway